
I’ve recently had to implement Google ReCaptcha in a custom PHP form. It’s an easy thing to do, in theory, if you know how all the pieces fit together, but there is not one single tutorial that shows all the steps. Below I provide a step by step high level overview of how to implement Google ReCaptcha. I’ll show the examples with the “I’m not a robot” Checkbox verification which uses ReCaptcha v2, but their latest v3 is quite awesome!
Step 1
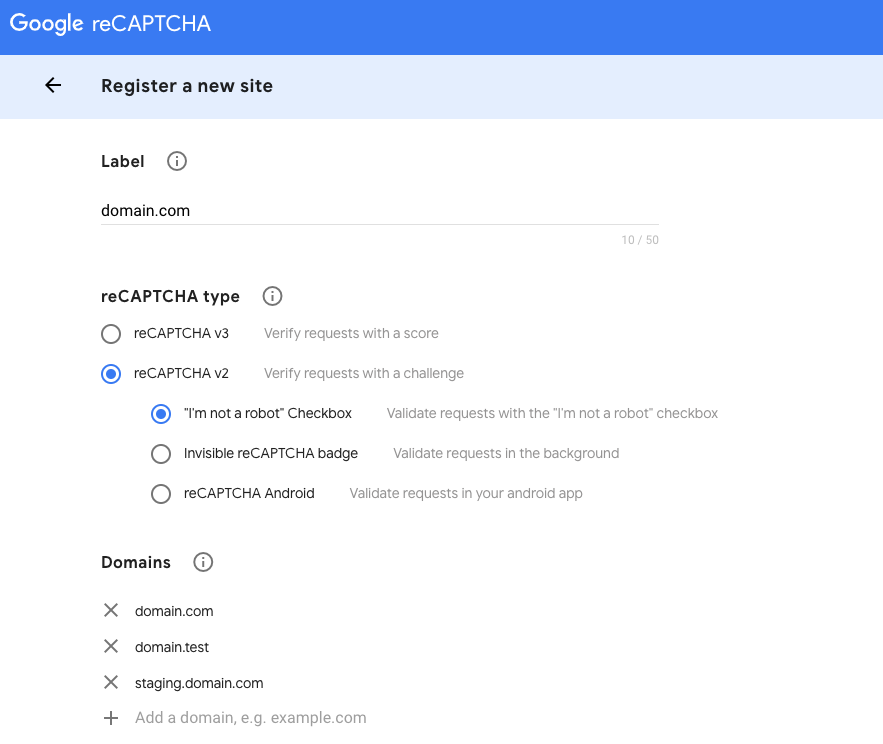
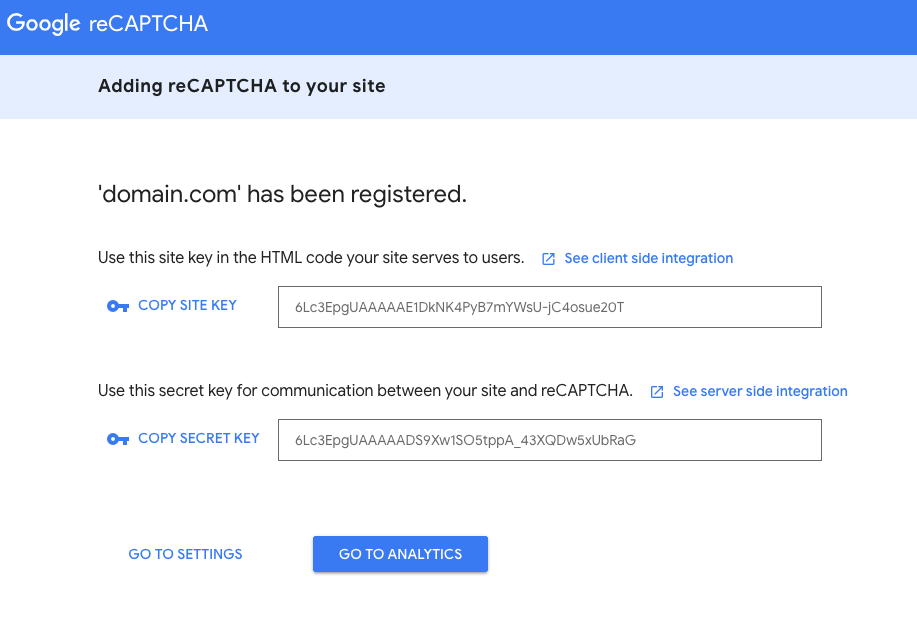
Login to your Google ReCaptcha Admin account and create the necessary site and secret keys. In the example below, notice how I added all the relevant domains, including the staging and local development domains. If you don’t do that, you won’t be able to test the form locally.
Step 2
The second step is to implement the frontend part of your code. The official Google documentation for this is here. This step is basically just two pieces of code. The first is including the necessary JS from google and the second is the HTML field for the ReCaptcha.
Put this line wherever you include all of your JS <script src="https://www.google.com/recaptcha/api.js" async defer></script>
Then put this code inside your form where you want the ReCaptcha to appear and replace your_site_key with the site key we generated in step 1 <div class="g-recaptcha" data-sitekey="your_site_key"></div>
Now you should see and be able to check the Google ReCaptcha checkbox in your form.
Google ReCaptcha v2 Checkbox
Step 3
In this step we will prevent the form from submitting until the checkbox is checked. It may be necessary to integrate this solution into your already existing frontend form validation, but the general idea is presented below.
$('form').submit(function(e) {
   if ($("#g-recaptcha-response").val() === '') {
      e.preventDefault();
      alert("Please check the recaptcha");
   }
});
Here we are preventing the submission of the form element if the captcha response has no value. We are showing an alert to the user. Please do not use the alert, but integrate a nice error message in some other way.
If you don’t have a backend processing your form, then you can stop the tutorial here. But if you are going this route, use the Google ReCaptcha v3.
Step 4: Integrate on the server side
Next we need to control whether or not the notification email is sent out depending on the response from the ReCaptcha. For this, I prefer to use the composer Google ReCaptcha PHP library. Make sure composer is installed before proceeding.
In your project folder, run the following command composer require google/recaptcha "^1.2". This will create a composer.json and a composer.lock file (if you don’t already have them in your project. It will also create a vendor folder. The vendor folder is what you will need to upload to your server. But only the composer.json and composer.lock is what you’d commit to your repo.
Next, at the top of your PHP file that processes the form submission (ie. the file in your form action attribute, usually a sendmail.php or thankyou.php file) add the following code which will autoload the Google ReCaptcha PHP library. You may need to adjust that path if the PHP file you’re adding this to is in a subfolder in your project.
require_once __DIR__ . '/vendor/autoload.php';
Next, you add the below code to receive the response from Google ReCaptcha. Use the secret key we receive in step one here.
$recaptcha = new \ReCaptcha\ReCaptcha( 'secret_key' );
$resp      = $recaptcha->setExpectedHostname( $_SERVER['HTTP_HOST'] )
                       ->verify( $_POST["g-recaptcha-response"], $_SERVER['REMOTE_ADDR'] );
What’s happening is we’re create a recaptcha object that is being sent to Google through the library along with the IP address of the user submitting the form and the value of the ReCaptcha checkbox. You may need to adjust $_SERVER['HTTP_HOST'] if it’s not returning the correct domain name, or alternatively you can hardcode the domain name you want to use.
Lastly, we want to prevent the submission of the email (or whatever action we want when the user submits the form) unless the response is successful. The code for this would look something like the below.
if ( $resp->isSuccess() ) {
    // code for processing your form goes here
} else {
    // code for showing an error message goes here
    $errors = $resp->getErrorCodes();
}
One thing to note, is that a user is not likely to get to that error message if you’ve implemented frontend validation and prevented the form from submitting unless the ReCaptcha checkbox is checked.