
In this blog post I will show you how to, in bulk, remove any color background to from any image.
Pre-requisites
- ImageMagick
- All of your images in one folder
How To Easily Install ImageMagick for Mac OSX
- First we install HomeBrew:
/usr/bin/ruby -e "$(curl -fsSL https://raw.githubusercontent.com/Homebrew/install/master/install)"
- Then we install ImageMagick:
brew install ImageMagick
- Test that ImageMagick is installed by running the command
magick, which should give you output with usage instructions
Removing Backgrounds From Images In Bulk
Once we have ImageMagick installed, we can begin to remove solid background colors like magic!
Here’s the command we will be working with:
find . -type f -name "*.jpg" -print0 | while IFS= read -r -d $'\0' file; do convert -verbose "$file" -transparent white "$file.png"; done
# Credit: http://www.vectorns.com/blog/technical-articles/18-how-to-remove-white-background-from-a-picture
To break this command down…
- First we are looking for all of the files with the extension .jpg. If you files have a different extension, just change that to whatever you need.
- Then we loop through all of the photos and convert white background to transparent
- At the same time of the loop, we convert the jpg file format to png (which support transparency)
The values in bold in my breakdown are the values that we can change. For example, let’s say we want to convert a black background to blue, we would run the following command:
find . -type f -name "*.jpg" -print0 | while IFS= read -r -d $'\0' file; do convert -verbose "$file" blue black "$file.png"; done
If you find that there are some remnants of the white background you may need to add fuzz to the command, so it will like like:
convert /Users/mike/Downloads/photo\ work/transparent/your.png -fuzz 20% -transparent white result.png
20% fuzz is a good place to start. Below are some example of how fuzz changes the output.
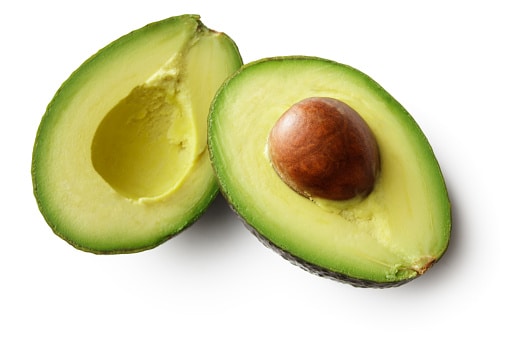
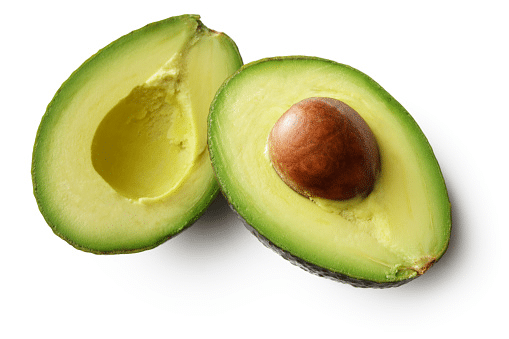
Original vs. Transparent Background (No Fuzz)
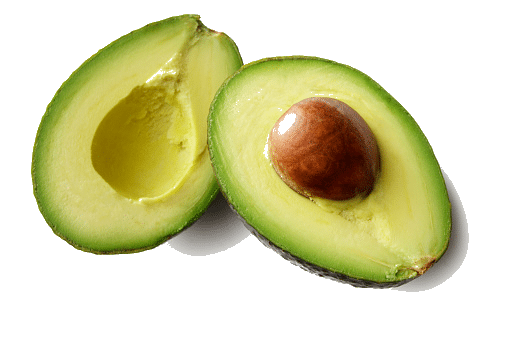
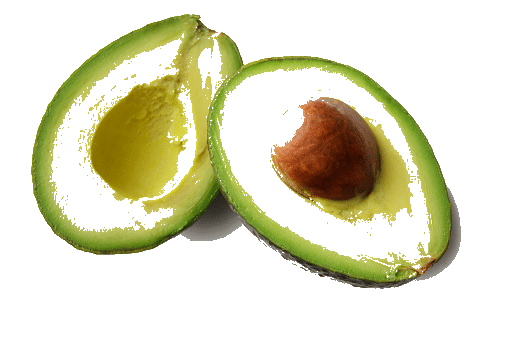
20% Fuzz vs 40% Fuzz
Thanks for posting this solution. I converted my .jpg images using the first command. Worked great excepted the images are now named NAME.jpg.png. Easy to fix.
I have having trouble with the fuzz command. I have over 3,000 images. I need to use fuzz to remove artifacts around the images. I tried the command you specified (changing the name to my directory), but I keep getting errors.
Can you please post the command for batch converting files with fuzz while make the background transparent? I would really appreciate it. I am not very good with Terminal commands. Thanks.
If you are using the bulk command provided as an example in this post, this is how you would add fuzz of 20%: